Dynamics 365 Business Central is a comprehensive business management solution that streamlines and automates processes across your organization. For effective warehouse management, configuring zones and bins is crucial. This blog post will guide you through the detailed steps to configure zones and bins in Dynamics 365 Business Central, offering a clear, beginner-friendly approach.
Understanding Zones and Bins
Before diving into this Dynamics 365 Business Central training, it's essential to understand what zones and bins are within the context of warehouse management.
Zones are logical areas within your warehouse that help in organizing and controlling inventory. They can be defined based on various criteria such as temperature control, product type, or picking speed.
Bins are the smallest storage units within these zones where actual items are stored. Bins help in mapping out the exact location of items, making inventory management more precise and efficient.
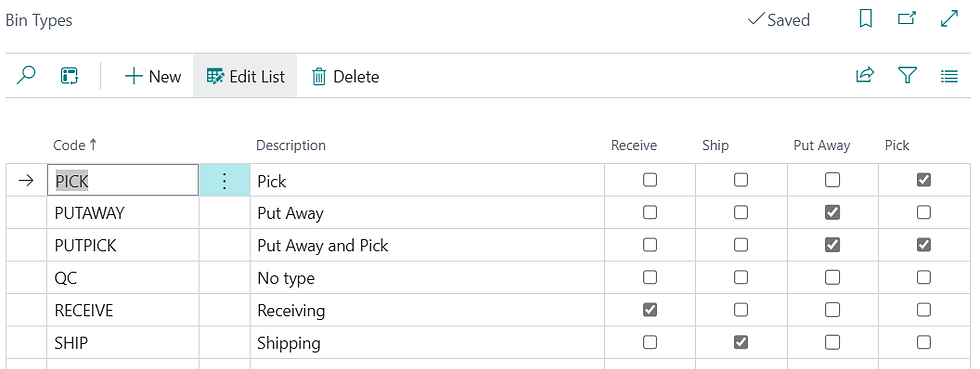
How to Configure Bin Types
Bin Types need to be configured before Zones.
Search for "Bin Types"
Enter a Code.
Place a checkmark in each box for each type of warehouse action (pick, put, receive, ship) that the Bin Type will support.


How to Configure Zones
To configure zones in Dynamics 365 Business Central, follow these steps:
Step 1: Access Location Card
Navigate to the Location List.
Click on a Location to open the Location Card.
Step 2: Define New Zones
On the Location Card, locate and select the Zones action.
Click on New to create a new zone.
Fill in the required fields:
Code: Enter a unique identifier for the zone.
Description: Provide a brief description of the zone.
Bin Type Code: Select the type of Bins that will be in the Zone.
Specify other optional fields as required for your warehouse operations.
Click OK to save the new zone.


How to Configure Bins
After setting up zones, the next step is to configure bins within those zones. Here's how to do it:
Step 1: Access Bin Configuration
Navigate to the Zones List for a Location.
Click on Bins.

Step 2: Create New Bins
In the Bins window, click on New to create a new bin.
Fill in the required fields:
Code: Enter a unique identifier for the bin.
Description: Provide a brief description of the bin.
Bin Ranking: Bins with a higher Bin Ranking will be picked from before Bins with a lower Bin Ranking.
Dedicated: Makes it so that the Bin will not be suggested for Put or Pick activity.
Click OK to save the new bin.

Using the Bin Content Creation Worksheet to Assign Default Bins to Items
Using the Bin Content Creation Worksheet in Dynamics 365 Business Central is a straightforward process if you follow these steps:
Step 1: Access the Bin Content Creation Worksheet
To begin, navigate to the Bin Content Creation Worksheet in Dynamics 365 Business Central. You can do this by using the search function or by accessing it through the Warehouse menu.
Step 2: Add Items to the Worksheet
Next, add the items you want to assign default bins to.
Step 3: Assign Default Bins
Now, assign default bins to the items in your worksheet. This can be done by entering the bin codes directly or by selecting them from a list. Ensure that each item is assigned to the most appropriate bin for efficient storage and retrieval.
Step 4: Validate the Worksheet
Once you have assigned bins to all items, validate the worksheet to ensure that there are no errors or inconsistencies. This step is crucial to avoid complications during the put-away and picking processes.
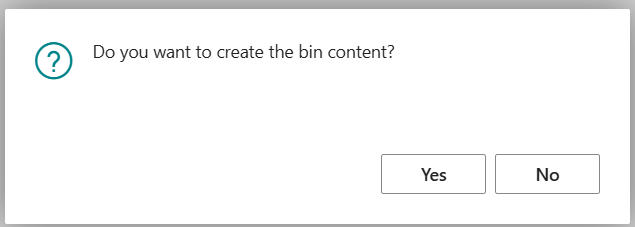
Step 5: Create Bin Content
After validation, use the Create Bin Content action to create the necessary Bin Content records to assign default Bins to Items. This step finalizes the process and ensures that your items are now associated with their respective default bins.


Step 6: Verify Bin Contents
After using the Create Bin Content action, navigate to the Item and view the Bin Contents for it.


Conclusion
Configuring zones and bins in Dynamics 365 Business Central might seem daunting at first, but by following these structured steps, you can streamline your warehouse operations effectively. Remember, proper configuration enhances inventory accuracy, improves efficiency, and supports optimal warehouse management. Should you encounter any issues, refer back to this guide or consult with an experienced Dynamics 365 professional.

Comentários